Postlist is a Micro.blog plugin that will add a short-code allowing you to a list of posts to a page, similar to Bear blog’s posts macro. The list of posts can be filtered to those of a specific category, and displayed either in chronological or alphabetical order.
For an example of how this looks, take a look at the lists of posts on this page of my blog.
Usage
Once installed, a post list can be added to a post or page by using the following short-code:
{{< postlist >}}
This will produce a list of all posts — both with and without titles — ordered in reverse chronological order.
Filtering By Category
Use the categories attribute to only show posts that match a given category:
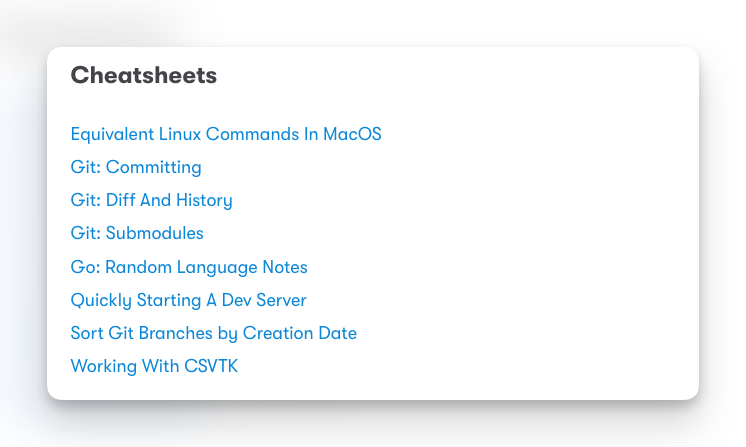
{{< postlist categories="Cheatsheet" >}}
Category names are case sensitive, and must match the name of the category as entered in Micro.blog. Multiple categories can be specified with commas, and a post must be in each one in order to appear in the post list.
{{< postlist categories="Cheatsheet,Git" >}}
Filtering By Title
Use the title-matches attribute to only show posts with titles that match a given regular expression. This uses the same regular expression engine as Hugo, which is a largely based on the RE2 syntax. Matches are case sensative.
Example: Filter posts with titles containing the word “carrot”:
{{< postlist title-matches="carrot" >}}
Example: Filter posts with titles beginning with “Photo:":
{{< postlist title-matches="^Photo:" >}}
Example: Filter out posts that don’t have a title:
{{< postlist title-matches=".+" >}}
Ordering
By default, post lists are appear in reverse chronological order (newest posts appears on the top). If you want to use a different ordering, you can set the order attribute. This attribute value takes an ordering criterium and an optional direction. The supported ordering criteria are:
alpha— order posts alphabetically, in ascending order (from A-Z).date— order posts based on post date, in ascending order (from oldest to newest).
Note: at the moment alpha will only consider the post’s title, which may result in some strange ordering when selecting posts without one. You can use title-matches to filter out posts that have no title.
Example: ordering posts by title from A-Z:
{{< postlist order="alpha" >}}
The default sort order is always in ascending order. To sort in descending order, add desc after the criterium.
Example: ordering posts by title from Z-A:
{{< postlist order="alpha desc" >}}
Example: ordering posts in reverse chronological order:
{{< postlist order="date desc" >}}
Item Limit
By default all posts matching the category filter will be included in the list. To limit the maximum number of posts displayed, use the limit attribute:
{{< postlist limit="3" >}}
Displaying Full Content
A post list can be configured to display the full content of posts matching the category filter. This changes the post list to something closer to the archive page, with the full post title, summary, or body included, rather than just the title or the first line of the summary.
To enable full display of a post list’s content, set display to content:
{{< postlist display="content" >}}
See Styling for the generated markup for posts displayed in this mode.
Full content mode will use the post summary in favour of the post body if one is found. To disable this, set content-options to no-summary. This will configure the short-code to disregard the summary and always use the post body (requires version 1.4.0 of the plugin):
{{< postlist display="content" content-options="no-summary" >}}
The markup used for post lists displayed in full content mode can be customised via the following micro-hooks:
partials/_postlist/post-content-before.html: will be called just before the wrapped<div>. This partial receives the entire post list as., allowing this template to be used for things like table of contents.partials/_postlist/post-content.html: will be called for each post item matching the filter.partials/_postlist/post-content-after.html: will be called just after the wrapped</div>. This partial receives the entire post list as..
Styling
List Mode
Post lists are rendered as an unordered lists with the postlist class:
<ul class="postlist">
  <li><a href="...">Item 1</a></li>
  <li><a href="...">Item 2</a></li>
</ul>
Post lists inherit the standard styling of ul elements, just without the left (start) padding and the bullet. They can be restyled by adding a CSS rule matching ul.postlist:
ul.postlist {
  // your custom styling here
}
Full Content Mode
Post lists with display="content" mode will be rendered within a wrapping div, with each item wrapped in a separate div item. The wrapping div will have the classes postlist and postlist-display-content to identify the subtree as being a list of posts with full content. The wrapping div and items are also annotated with the h-feed microformat.
<div class="postlist postlist-display-content h-feed">
  <div class="h-entry">
    <h2 class="p-name"><a href="...">Title, if any...</a></h2>
    <div class="p-summary"><p>Summary, if any...</p></div>
    <div class="e-content">Content...</div>
  </div>
  <div class="h-entry">
    ...
  </div>
</div>
Feedback
Any feedback — bugs, feature suggestions, etc. — on this plugin is welcomed. Probably the best place to raise them is by creating an issue on GitHub. Alternatively, you can hit me up on Micro.blog.